
Installing Apache Server
Download and Install the latest version of Apache server from http://httpd.apache.org/download.cgi. Choose the installer that includes OpenSSL (httpd-2.2.22-win32-x86-openssl-0.9.x.msi). Once downloaded, Run the installer with the admin privileges and chose the default options. It is recommended to install for all users on Port 80.

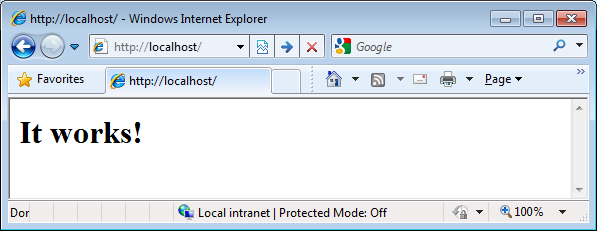
Now test if the Apache web server is running correctly by pointing your web browser to http://localhost/ - a pre-configured Website should show up.
Installing the Subversion
Download the latest Subversion Win32 binaries for Apache at http://subversion.apache.org/packages.html#windows. Run the subversion installer and follow the instructions. Allow the default options to be checked for installation. After the installation check if the bin path of the Subversion is added to the ‘Path’ system variable. If not, add them manually. After adding the path, go to the command prompt and check if the installation is success by typing ‘svn’ and press enter. The below message should be displayed if the installation is successful.

After checking the installation, copy the files ‘mod_dav_svn.so’ and ‘mod_authz_svn.so’ from Subversion’s bin directory (Usually C:\Program Files (x86)\Subversion\bin) to Apache’s module directory (Usually C:\Program Files (x86)\Apache Software Foundation\Apache2.2\modules).
Then Copy the file libdb*.dll and intl3_svn.dll from the Subversion bin directory to the Apache bin directory.
Edit the Apache's configuration file (usually C:\Program Files (x86)\Apache Software Foundation\Apache2.2\conf\httpd.conf) with a text editor such as Notepad/Editplus and make the following changes:
We will admin privileges to make changes to this file. Right click on Notepad and select ‘Run as administrator’ and then open the httpd.conf file.
Uncomment the following lines:
#LoadModule dav_fs_module modules/mod_dav_fs.so
#LoadModule dav_module modules/mod_dav.so
Add the following two lines to the end of the LoadModule section.
LoadModule dav_svn_module modules/mod_dav_svn.so
LoadModule authz_svn_module modules/mod_authz_svn.so
Create a repository using svnadmin
Use the svnadmin command to create the svn repository.

Configuration
After setting up the Apache and Subversion, we need to configure the Apache to make the Apache understand which URL will be used for repositories. To do this we need to edit the Apache configuration file (we will require administrator privileges).
The configuration file is usually located in C:\Program Files (x86)\Apache Software Foundation\Apache2.2\conf\httpd.conf.
At the end of the config file add the following lines:
<Location /svn>
DAV svn
SVNListParentPath on
SVNParentPath D:\Repositories
AuthType Basic
AuthName "Subversion repositories"
AuthUserFile passwd
#AuthzSVNAccessFile svnaccessfile
Require valid-user
</Location>
The above changes configure the Apache server so that all the Subversion repositories are physically located below D:\Repositories. The repositories are served to the outside world from the URL http://MyIp/svn/ Access is restricted to known users/passwords listed in the passwd file. To create the passwd file, open the command prompt and change to the Apache server folder (C:\Program Files (x86)\Apache Software Foundation\Apache2.2) and create the passwd file using the below command.
C:\Program Files (x86)\Apache Software Foundation\Apache2.2>bin\htpasswd -c passwd <your user name>
It will prompt for the user to enter the password and on entering the password, press enter and then retype the password and then again press enter. Now the user credential will be created. And this can be used to access the svn.

After creating the user, restart the Apache server.

Try accessing the url http://localhost/svn/ from the browser, the browser will prompt for the user name and password, enter the user name and password you created

If the login is success then use the repository is displayed below

Use any of the svn clients like TortoiseSVN to access the repository and checkout in to a folder.
PS:
Download and Install the latest version of Apache server from http://httpd.apache.org/download.cgi. Choose the installer that includes OpenSSL (httpd-2.2.22-win32-x86-openssl-0.9.x.msi). Once downloaded, Run the installer with the admin privileges and chose the default options. It is recommended to install for all users on Port 80.
Now test if the Apache web server is running correctly by pointing your web browser to http://localhost/ - a pre-configured Website should show up.
Installing the Subversion
Download the latest Subversion Win32 binaries for Apache at http://subversion.apache.org/packages.html#windows. Run the subversion installer and follow the instructions. Allow the default options to be checked for installation. After the installation check if the bin path of the Subversion is added to the ‘Path’ system variable. If not, add them manually. After adding the path, go to the command prompt and check if the installation is success by typing ‘svn’ and press enter. The below message should be displayed if the installation is successful.
After checking the installation, copy the files ‘mod_dav_svn.so’ and ‘mod_authz_svn.so’ from Subversion’s bin directory (Usually C:\Program Files (x86)\Subversion\bin) to Apache’s module directory (Usually C:\Program Files (x86)\Apache Software Foundation\Apache2.2\modules).
Then Copy the file libdb*.dll and intl3_svn.dll from the Subversion bin directory to the Apache bin directory.
Edit the Apache's configuration file (usually C:\Program Files (x86)\Apache Software Foundation\Apache2.2\conf\httpd.conf) with a text editor such as Notepad/Editplus and make the following changes:
We will admin privileges to make changes to this file. Right click on Notepad and select ‘Run as administrator’ and then open the httpd.conf file.
Uncomment the following lines:
#LoadModule dav_fs_module modules/mod_dav_fs.so
#LoadModule dav_module modules/mod_dav.so
Add the following two lines to the end of the LoadModule section.
LoadModule dav_svn_module modules/mod_dav_svn.so
LoadModule authz_svn_module modules/mod_authz_svn.so
Create a repository using svnadmin
Use the svnadmin command to create the svn repository.
Configuration
After setting up the Apache and Subversion, we need to configure the Apache to make the Apache understand which URL will be used for repositories. To do this we need to edit the Apache configuration file (we will require administrator privileges).
The configuration file is usually located in C:\Program Files (x86)\Apache Software Foundation\Apache2.2\conf\httpd.conf.
At the end of the config file add the following lines:
<Location /svn>
DAV svn
SVNListParentPath on
SVNParentPath D:\Repositories
AuthType Basic
AuthName "Subversion repositories"
AuthUserFile passwd
#AuthzSVNAccessFile svnaccessfile
Require valid-user
</Location>
The above changes configure the Apache server so that all the Subversion repositories are physically located below D:\Repositories. The repositories are served to the outside world from the URL http://MyIp/svn/ Access is restricted to known users/passwords listed in the passwd file. To create the passwd file, open the command prompt and change to the Apache server folder (C:\Program Files (x86)\Apache Software Foundation\Apache2.2) and create the passwd file using the below command.
C:\Program Files (x86)\Apache Software Foundation\Apache2.2>bin\htpasswd -c passwd <your user name>
It will prompt for the user to enter the password and on entering the password, press enter and then retype the password and then again press enter. Now the user credential will be created. And this can be used to access the svn.

After creating the user, restart the Apache server.
Try accessing the url http://localhost/svn/ from the browser, the browser will prompt for the user name and password, enter the user name and password you created
If the login is success then use the repository is displayed below

Use any of the svn clients like TortoiseSVN to access the repository and checkout in to a folder.
PS:
- If the port 80 is already being used by some other application, you may get an error. So make sure that no application is using the port 80. To be more on the safer side, modify the ‘Listen 80’ line in the httpd.conf file to Listen 81 and restart the server. Now the link can be accessed from http://localhost:81/svn/
- The system may be behind the proxy, so check if entry http-proxy-host and http-proxy-port in the file C:\Users\<User>\AppData<hidden folder>\Roaming\Subversion\servers is uncommented and the appropriate IP is configured.


